
Appearance
Item Management
Items are the heart of TiniVault. An "item" can be anything — a physical appliance, a warranty document, a receipt, a contract, or any other thing worth tracking. Every item can have custom fields, tags, attached files, and links to other items.
Creating Items
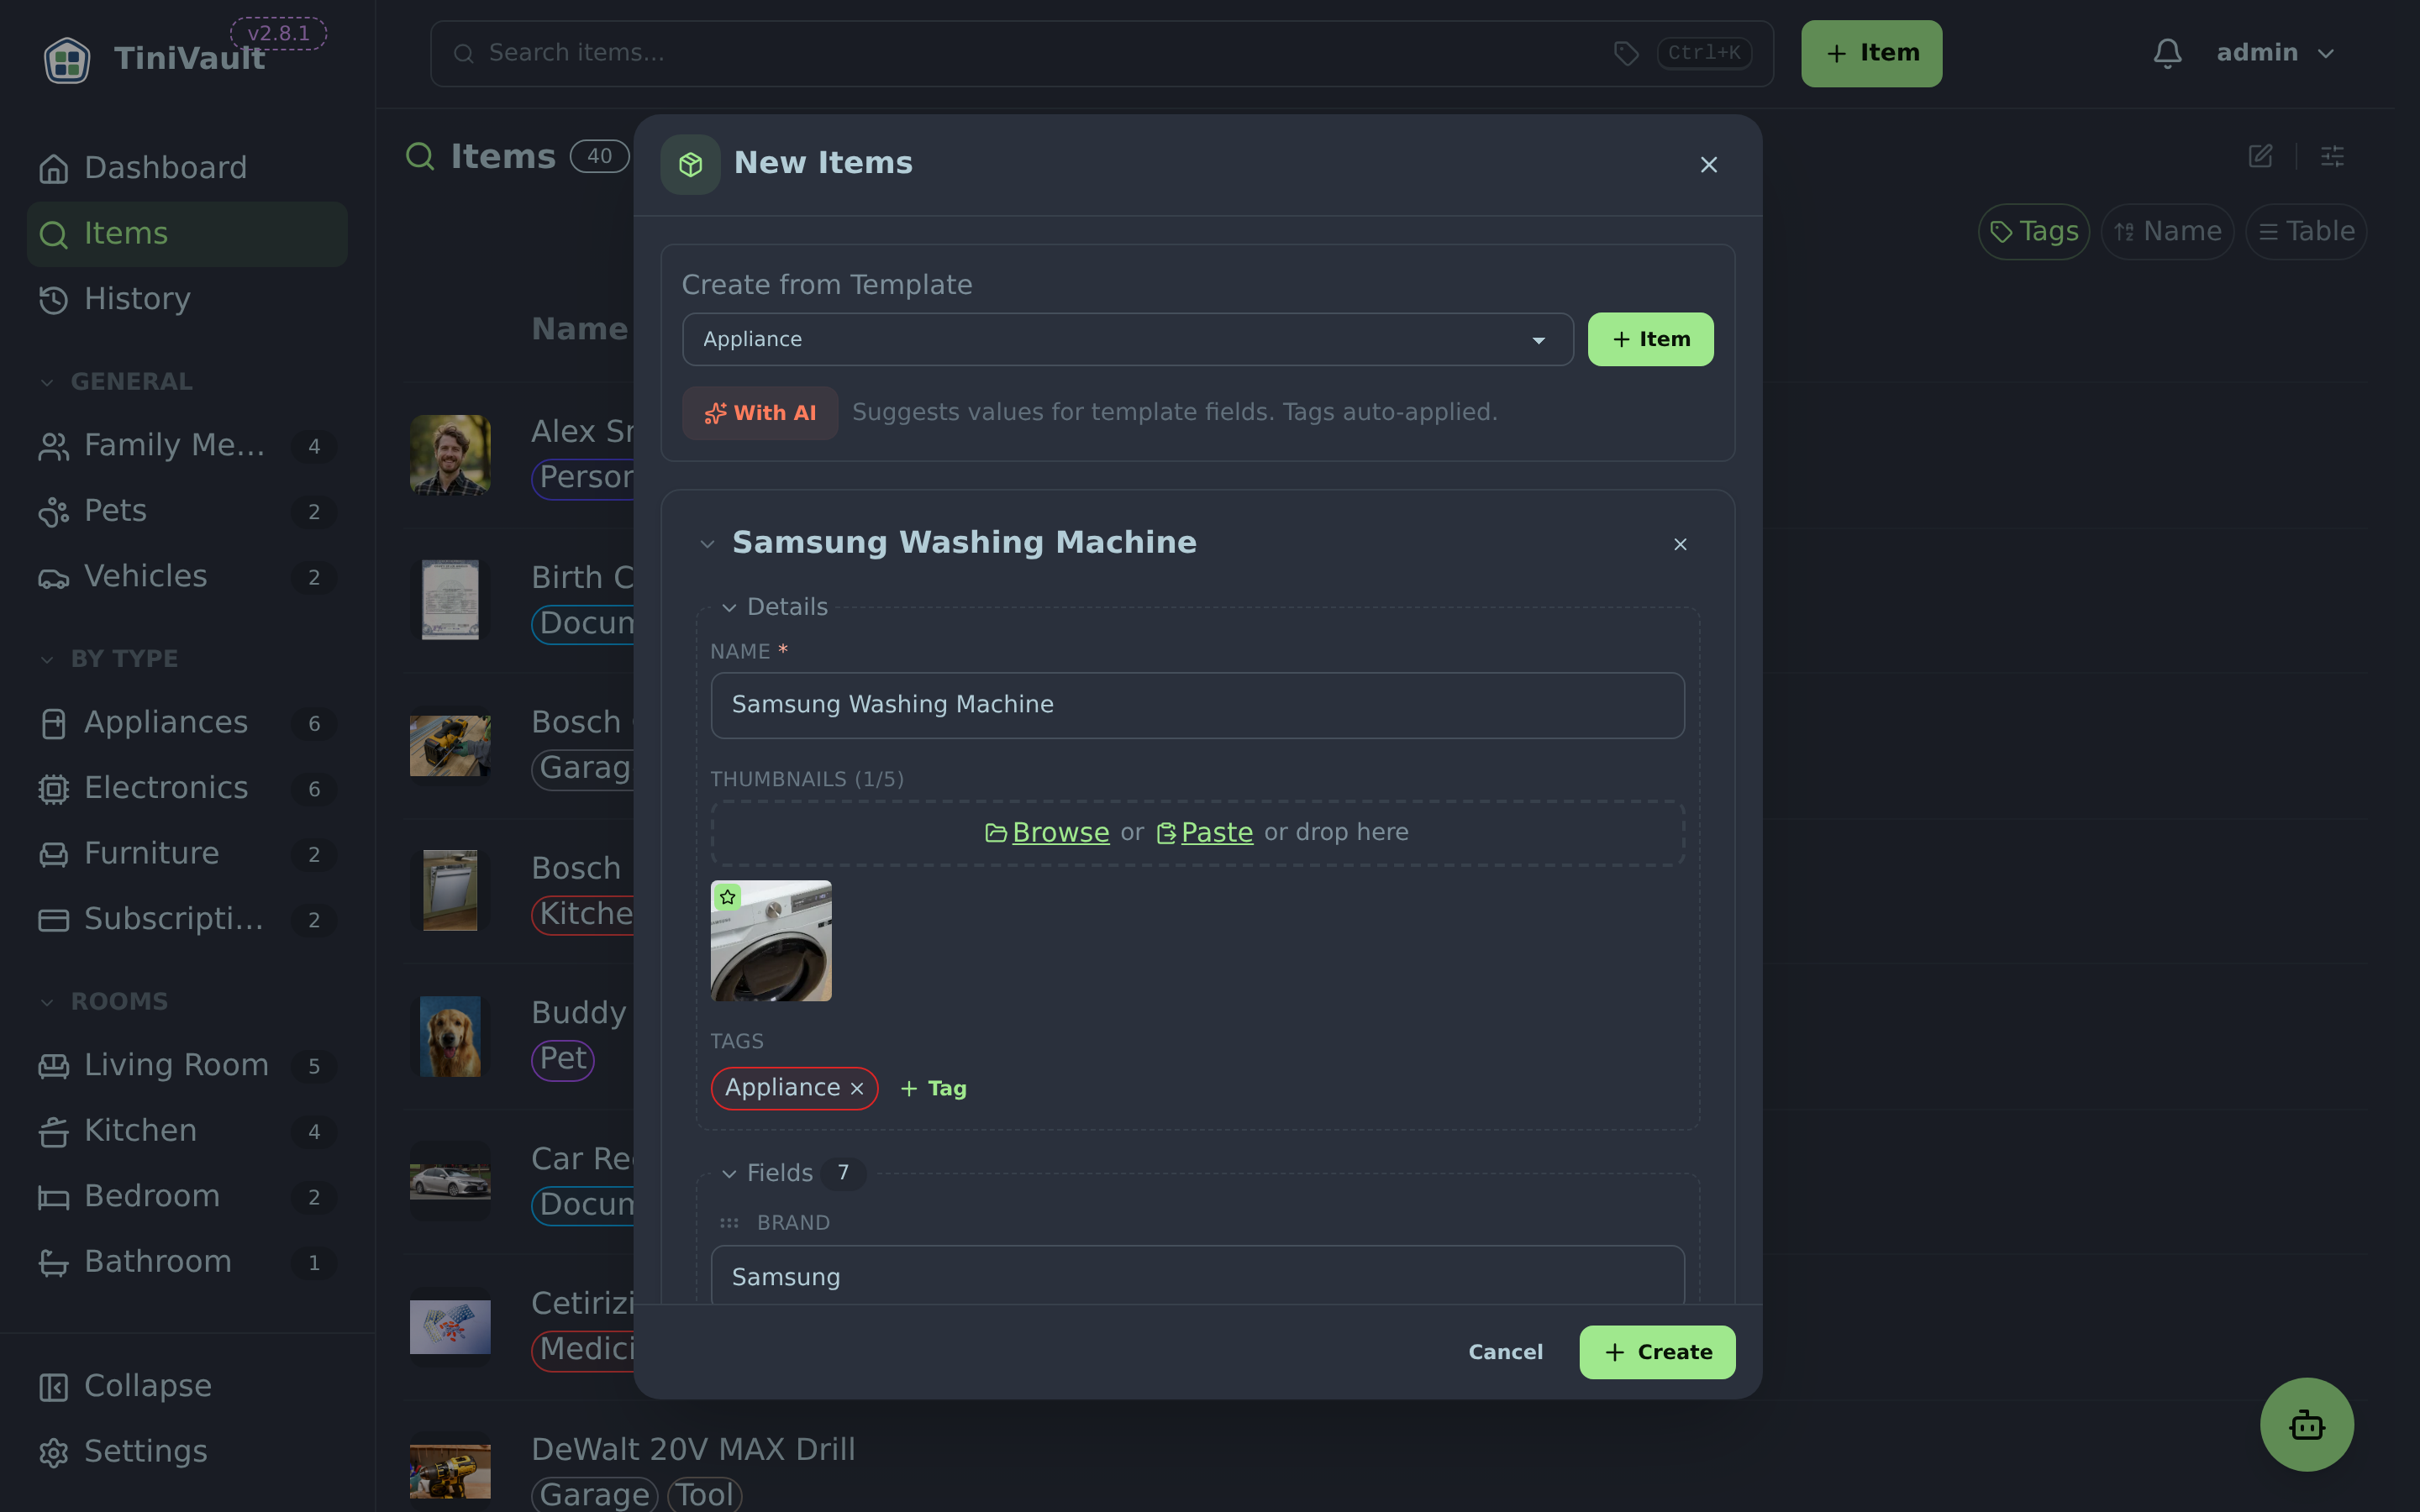
Using Templates
Templates are pre-configured blueprints that automatically add the right fields when you create an item. For example, an "Appliance" template might include fields for Purchase Date, Price, Warranty Expiry, and Model Number.
- Click + to open the New Item dialog
- Select a template from the Template dropdown
- The fields defined in the template are added automatically
- Fill in the values and save
TIP
Changes to a template do not affect items you've already created — so you can freely edit templates without worrying about existing items.

Batch Creation
Need to add multiple similar items at once? Use batch creation:
- Click + to open the New Item dialog
- Fill in the first item
- Click Add Another to save the current item and start a new one (your draft is preserved)
- Repeat until done
- Click Save on the last item
Your draft is automatically saved in your browser, so if you accidentally close the dialog, your work won't be lost.
AI Photo Analysis
TiniVault can analyse photos to automatically extract item details:
- Click + to open the New Item dialog
- Click Analyse Photos to open the AI analysis tool
- Upload one or more photos of the item (e.g., a photo of the appliance, its label, or its manual)
- The AI examines the photos and suggests a name and fields
- Review the suggestions and click Accept to apply them
- Adjust as needed and save
TIP
For best results, include a photo of the item's label or specifications plate — this usually contains the model number, serial number, and technical details.
TIP
After you save a single item, the Item View dialog opens automatically so you can confirm what was saved. Click Edit in that dialog if you need to change anything. Saving multiple items at once skips this step and returns you to the list.
Viewing Items
Item List
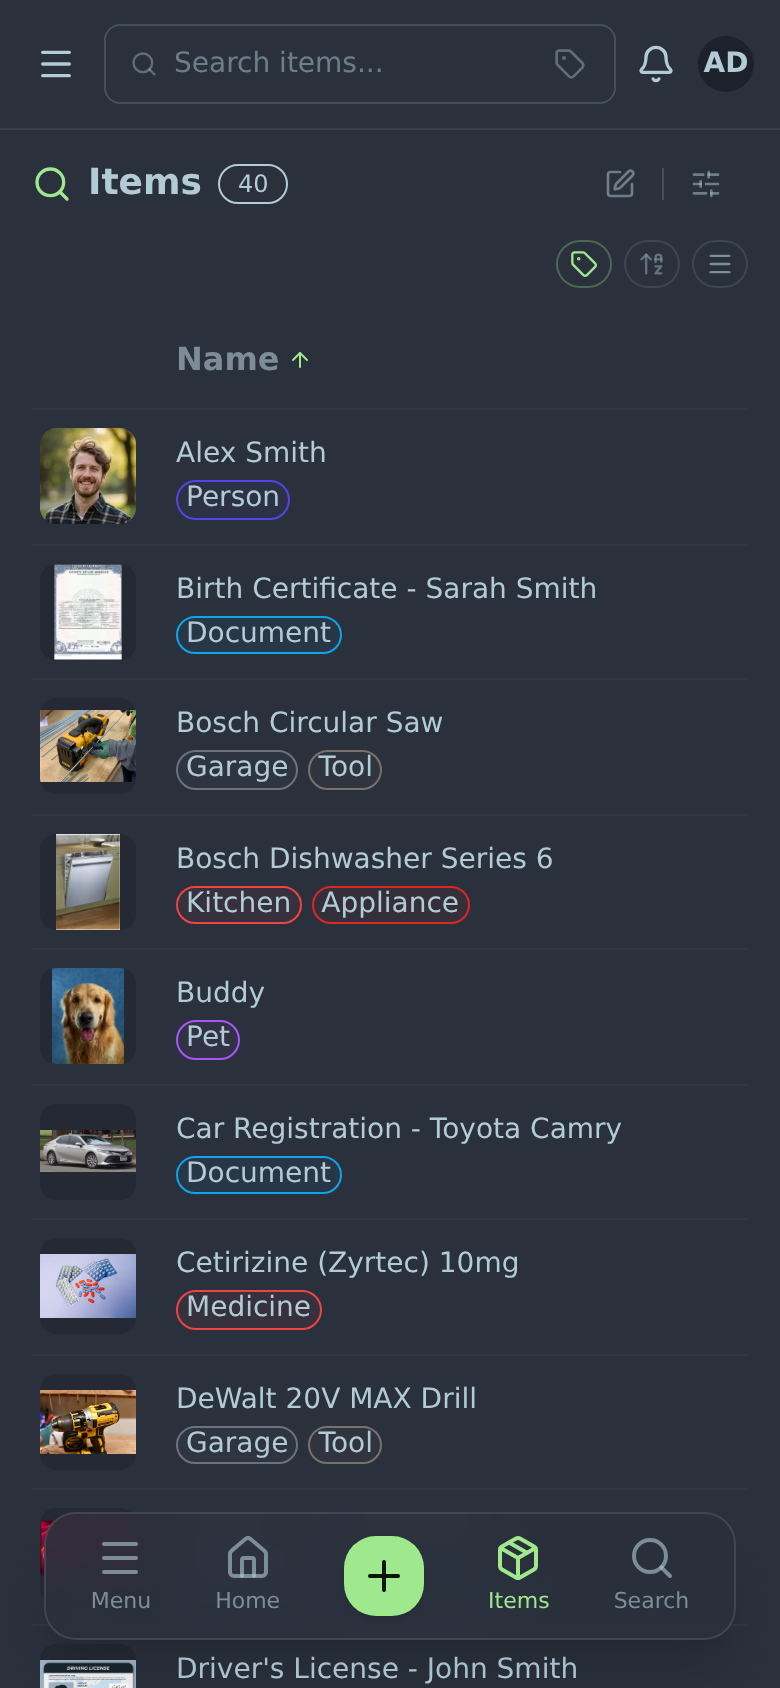
The main search page shows your items as either a list (table view) or a card grid. Each item shows:
- Thumbnail image (if any files are attached)
- Item name
- Tags
- Key field values
Click any item to open it in the Item View dialog.
By default the list hides archived items. The filter panel has an Archived control with three modes — None (default, hide archived), Include (show everything), and Only (only archived items). When archived items are shown, each is marked with an Archived badge.
Item View Dialog
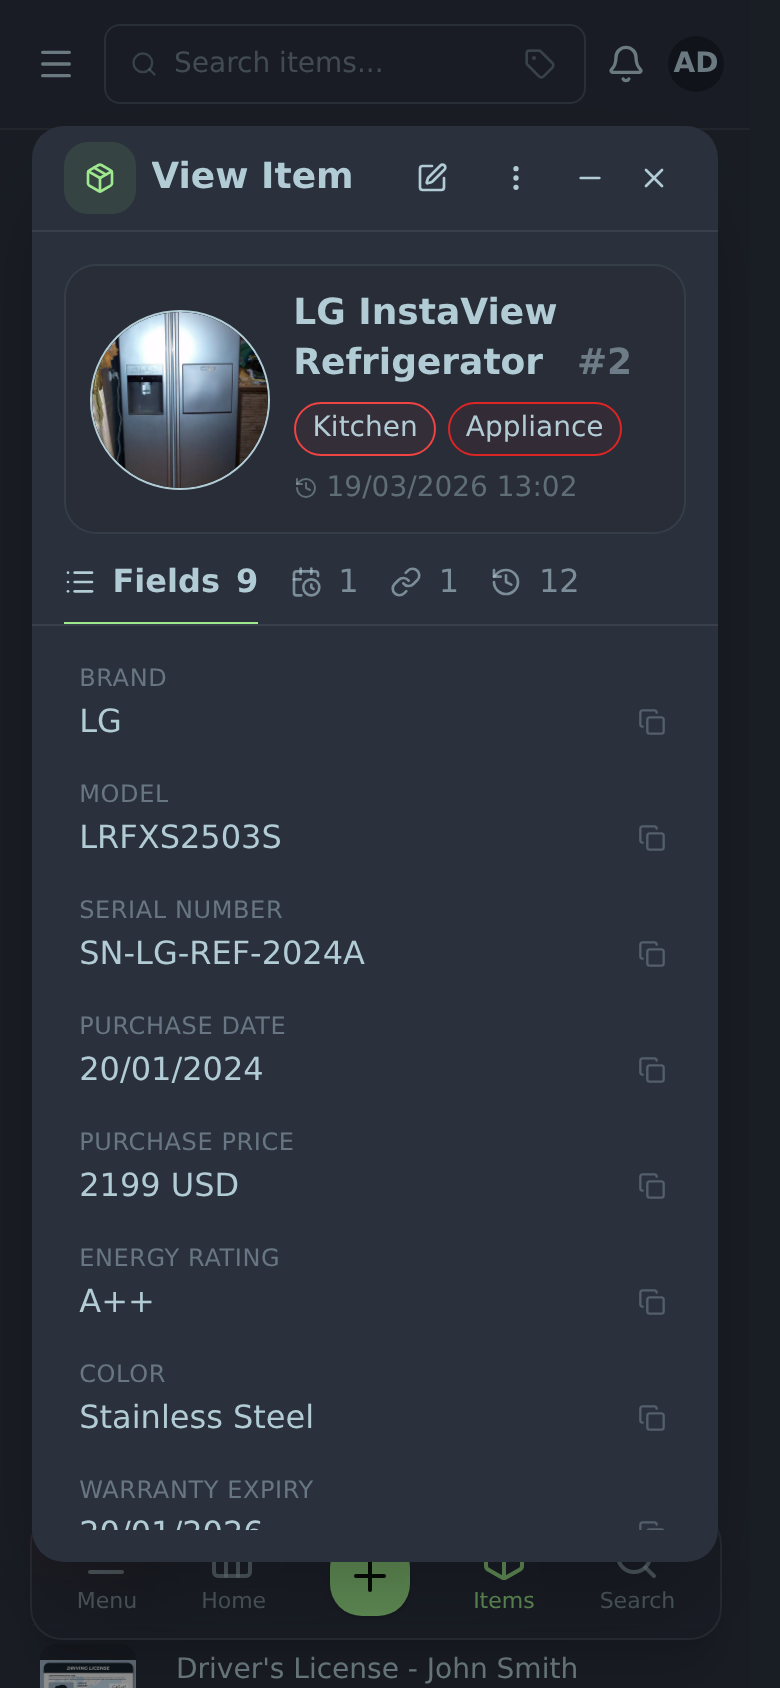
The Item View dialog shows all details of an item in a read-only layout. A sticky header keeps the item's thumbnail, name, and tags visible — it collapses into a compact bar as you scroll — with action buttons (Edit, Minimize, Delete) at the top.
Below the header, the details are split into tabs so a field-heavy item stays easy to scan. Only tabs with content are shown (History is always available), and each tab shows a count:
- Fields — all field values: shared catalog fields and free-form custom fields together in one list (custom fields are marked with a small item icon)
- Schedules — reminders/automations on the item (with an Expand all / Collapse all control)
- Referenced by — other items that link to this one
- History — the item's change history (loads more as you scroll)
Full-size thumbnails can be swiped or clicked to navigate.
Minimizing & switching between items
The Item View dialog has a Minimize button in its header (next to Close). Minimizing tucks the item into a small pill at the edge of the screen instead of closing it — the item stays exactly as you left it (same tab, scroll position, expanded fields) so you can pick up right where you stopped. Pressing Esc or clicking outside the dialog also tucks it away (only the × Close button discards it).
- Restore it — click the pill to reopen the item.
- Keep several — minimize more than one and they stack into the pill with a count. Click the pill to fan them out, then click any one to open it.
- See what's open — once you have something minimized, the item you're currently viewing also shows on the pill (highlighted), so it lists everything you have on the go.
- Switch quickly — the pill floats above open dialogs, so while you're viewing one item you can click another in the pill to jump straight to it (the current one tucks back into the pill).
- Move it — drag the pill; it snaps to the left or right edge wherever you drop it, and remembers that spot.
- Dismiss — the × on the pill closes a single minimized item; with several, it offers Close all (asks first).
On a wide screen the pill becomes a dock along the bottom-center of the window, like the macOS dock. The item you're currently viewing also appears there (highlighted) alongside any you've minimized, so the dock always shows everything open — click any face to jump to it, hover for its name, or use the × to close one. The dock stays put (no dragging) and tidies the faces smaller as more pile up.
Minimized items stay while you move around the app and clear when you reload the page.
Editing Items
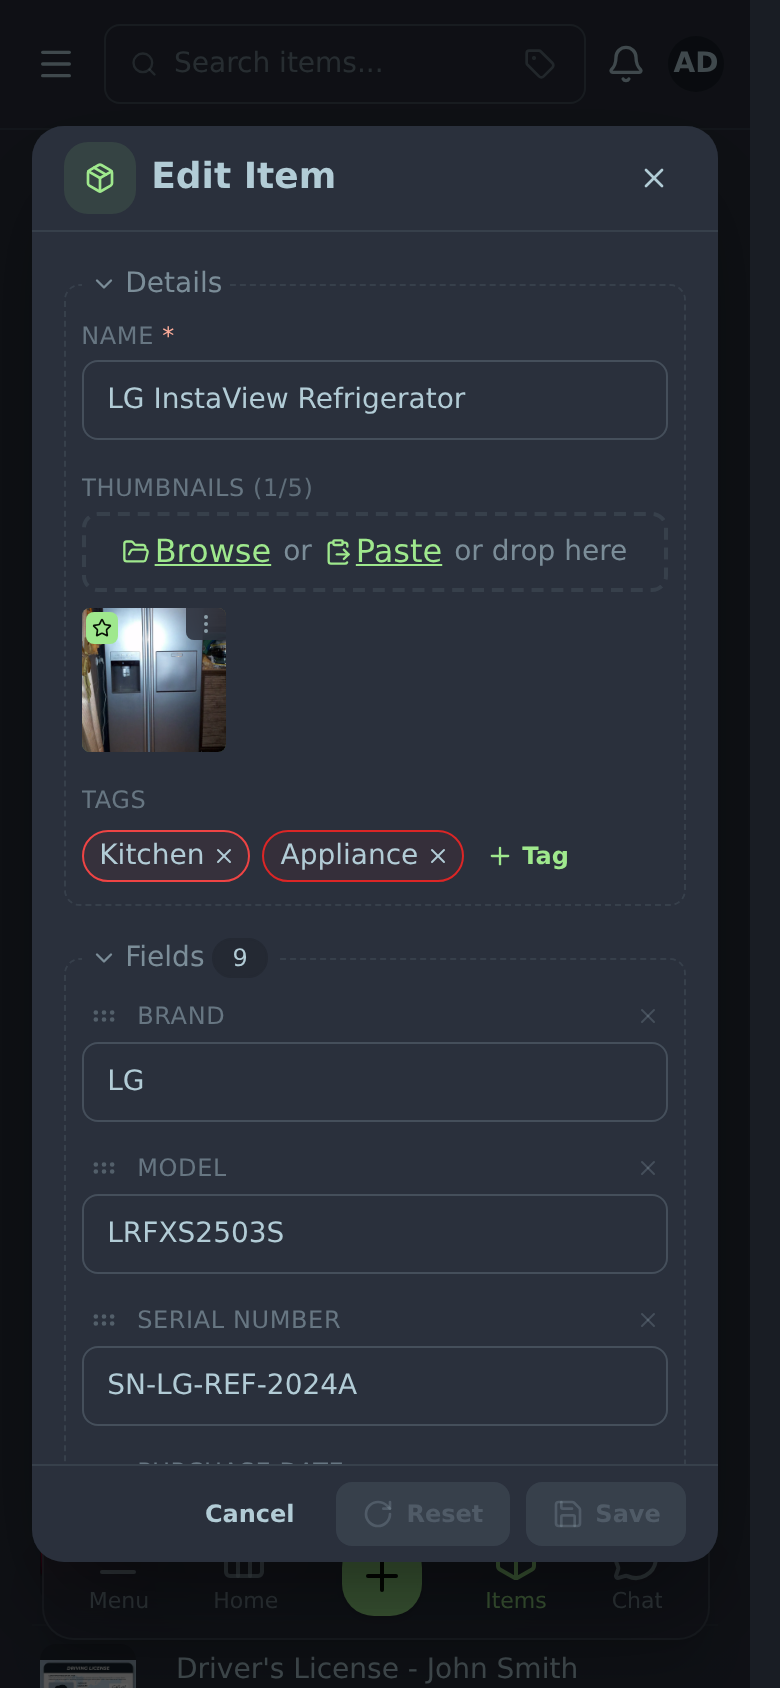
Click the Edit button (pencil icon) on any item to open the Edit Item dialog.
The dialog groups everything into collapsible sections — Details (name, thumbnails, tags), Fields, and Schedules — each with a count. Click a section heading to collapse it; while collapsed it shows a one-line summary (field names, schedule names, etc.) so you can still see what's inside at a glance.
Modifying Fields
You can add, edit, or remove any field value. The available field types are:
- Text — any short text (names, descriptions, model numbers)
- Long text — multi-line notes
- Number — numeric values (quantity, measurements)
- Monetary — amounts with a currency (e.g., £150.00 GBP)
- Date — calendar dates with a date picker
- Date & time — a date together with a time of day
- Yes/No — a yes/no toggle
- Item Reference — a link to another item
- Item References — links to several items at once
- File — a file attached directly to the field
To add a field, open the + Field dropdown at the bottom of the Fields list. Pick an existing catalog field, or use + New Field to define a new reusable field, or + Custom Field to add a one-off field to just this item. Catalog fields and per-item custom fields live in the same list — custom fields are marked with a small item icon. See Tags, Fields & Templates for the difference between the two.
Adding and Removing Tags
In the Edit dialog, click the Tags area to open the tag picker. Search for tags by name or scroll to find them. Click to add or remove tags.
Linking Items Together
You can link related items together — for example, link a washing machine to its warranty document, or link a receipt to the item it belongs to.
- In the Edit dialog, find an Item Reference field
- Click the field to open the item selector
- Search for the item you want to link
- Select it to create the link
Linked items are visible in the Item View dialog and you can click through to navigate between them.
Reordering Fields
Drag and drop fields in the Edit dialog to change their display order. Click the drag handle (⠿) on the left side of a field and drag it to the desired position.
Copy or Move Fields
Sometimes you've filled in fields on one item that really belong on another — or you want to split some fields out into a brand-new item. Instead of retyping them, copy or move them in one step.
Open the item, click the ⋯ (more actions) menu in the Item View dialog, and choose Copy or move fields…. A dialog opens with two sections:
- Fields to copy — tick the fields you want to take. Both catalog fields and per-item custom fields are listed together.
- Copy to — choose where they go:
- New item — opens the New Item dialog pre-filled with the selected fields, so you can name it and save.
- Existing items — search and pick one or more items. Each section collapses to a short summary so you can review your choices at a glance.
By default only the field names come across — the destination gets the fields blank, ready for you to fill in. A destination that already has one of those fields keeps its own value; fields it doesn't have yet are added empty. This is handy for giving several items the same structure without copying one item's specific values.
To bring the values across too, tick Also copy values in the footer. Now the source's values are carried over, and if a destination already has a field with the same name its value is overwritten (you'll see an "overwrites" badge and a warning before you confirm).
To move fields instead of copying, tick Delete from source — the selected fields are removed from the original item once the copy succeeds. Because a move takes the values with it, this option is only available once Also copy values is on. Every affected item records the change in its History.
Files & Thumbnails
Uploading Files
Each item can have files attached to it — PDFs, images, documents, and more.
In the Edit dialog:
- Scroll to the Files section
- Drag and drop files onto the upload area, or click Browse to select files
- Files are saved immediately when uploaded
To view an attached file, click on it in the Item View dialog. PDFs open in a browser-based viewer where you can:
- Navigate pages
- Zoom in and out
- Copy a page as an image (useful for extracting warranty details)
Managing Thumbnails
Thumbnails are the visual previews shown on item cards. TiniVault automatically generates thumbnails from uploaded images and PDFs.
To manage thumbnails:
- Open an item in the Edit dialog
- Click Manage Thumbnails to open the thumbnail manager
- From here you can:
- Add new thumbnail images
- Rotate thumbnails (click the rotate button)
- Reorder thumbnails by dragging
- Delete thumbnails you don't need

File limits
- Thumbnails: WebP format, max 5 MB each, up to 10 per item
- Files: No strict size limit (depends on your server's storage)
Archiving Items
Archiving is a reversible alternative to deleting — it sets an item aside without losing it. Archived items are hidden from the default list and from search, but can be brought back at any time.
To archive an item:
- Open the item to view its details
- Open the Actions menu (
⋮) in the dialog header and choose Archive - Confirm in the prompt
The item disappears from the default list right away. To see it again, open the filter panel and switch the Archived control to Include or Only — archived items show with an Archived badge.
To restore an archived item, open it (from the Include/Only view) and choose Restore from the Actions menu. It returns to the default list.
You can also archive several items at once in Bulk Edit mode.
Both archive and restore are recorded in the item's History.
Deleting Items
To delete an item:
- Open the item to view its details
- Open the Actions menu (
⋮) in the dialog header and choose Delete - Confirm the deletion in the confirmation prompt
WARNING
Deletion is permanent. Consider whether you want to simply remove tags or archive the item before deleting it entirely.
Bulk Edit
When you need to change tags, update field values, or delete many items at once, switch the search results into Bulk Edit mode. The selection lives on the current page only — navigating to another page or leaving the search clears it.

Turning bulk edit on
- Open the Search page (or any Saved View)
- In the sticky header, click the bulk-edit icon on the left of the filter toggle — it shows a pencil (✎) when bulk mode is off and switches to an × in the primary color when it's on
- Each row in the results grows a selection checkbox on the left
To leave bulk mode, click the bulk-edit icon again, or press Stop on the floating action bar.
Selecting items
- Click the checkbox on any row to add or remove that item from your selection
- The floating action bar at the bottom shows the select-all icon for the current page:
- ☐ empty — nothing on this page is selected
- ▣ partial — some rows on this page are in your selection
- ☑ full — every row on this page is selected
Tapping the icon toggles the whole page in one go — if anything was missing it selects the rest; if everything was already selected it clears the page.
TIP
The count next to the checkbox shows how many items you've picked in total. On mobile the label hides when you scroll and the number stays visible beside the icon so you always know the size of your selection.

Applying changes
Three action buttons open next to the count:
Tags — opens a popover with every tag. Click a row to cycle its intent: nothing → add (green ➕) → remove (red ➖) → back to nothing. The summary at the bottom lists what will change; hit Apply to send one request that updates every selected item.
Fields — opens a popover with two buttons:
- Set field opens a searchable field list. Pick a field and a chip appears in the Set band at the bottom of the popover, expanded so you can type the new value. Click the chip again (or anywhere outside it) to collapse — only one chip is expanded at a time.
- Delete field opens the same searchable list; picking a field adds it to the Delete band. Each chip has a small × to take it back out. Deleting a field clears it completely from every selected item — use it when you want to wipe a value rather than overwrite it.
The same field can't appear in Set and Delete at the same time; the pickers automatically hide fields already in use. Hit Apply to send a single request that sets and deletes in one shot.
Remove — a dropdown grouping the two destructive actions:
- Archive — confirms first, then archives every selected item (reversible). Archived items leave the default list but can be restored individually from their Actions menu — see Archiving Items.
- Delete — confirms first, then removes every selected item. There is no undo for bulk delete; deleted items no longer have a history tab to read, but the removal events still show up on the global History page so you can audit what disappeared and when.

After applying
The popover closes, a toast shows how many items were updated (and how many failed, if any), and the search reruns so you see the new values straight away. Partial failures do not roll back the items that succeeded — re-run the action or open the affected items individually to fix the rest.
Item Ideas
Here are some common things families track in TiniVault:
🏠 Home Appliances
- Washing machine, fridge, oven, dishwasher, microwave
- Fields: Purchase Date, Purchase Price, Warranty Expiry, Model Number, Serial Number
- Tag: #appliance
📄 Warranties & Manuals
- Warranty certificates, user manuals — attach the PDF
- Fields: Expiry Date, Issuing Company
- Tag: #warranty, #manual
🧾 Receipts & Invoices
- Purchase receipts, repair invoices — attach a scan or photo
- Fields: Purchase Date, Amount, Shop/Vendor
- Tag: #receipt
🏥 Insurance Policies
- Home contents, appliance cover, extended warranties
- Fields: Policy Number, Provider, Renewal Date, Annual Premium
- Tag: #insurance
Connecting Related Items
The real power comes when you link items together using Item Reference fields. Here's how these four types connect:
Example: Tracking a washing machine end-to-end
Create the appliance — "Samsung Washing Machine" with model number, serial number, purchase date, and price. Tag it #appliance. Take a photo of the label.
Create the receipt — "Washing Machine Receipt" with the purchase date, amount, and shop name. Attach a scan of the receipt. Add an Item Reference field linking it to the washing machine.
Create the warranty — "Washing Machine Warranty" with the expiry date. Attach the warranty PDF. Add an Item Reference linking it to the washing machine.
Create the insurance — "Home Contents Insurance" with the policy number, provider, renewal date, and premium. Attach the policy document. Add an Item Reference linking it to the washing machine (and any other covered appliances).
Now when you open the washing machine, you can click through to its receipt, warranty, and insurance policy — everything in one place. And if you open the insurance policy, you'll see all the appliances it covers.
Here's what those connections look like:
                ┌─────────────────────────┐
                │  🏠 Samsung Washing     │
                │     Machine             │
                │  #appliance             │
                └──────────┬──────────────┘
                           │
              ┌────────────┼────────────────┐
              │            │                │
              ▼            ▼                ▼
┌─────────────────┐ ┌──────────────┐ ┌──────────────────┐
│ 🧾 Washing      │ │ 📄 Washing   │ │ 🏥 Home Contents │
│    Machine      │ │    Machine   │ │    Insurance     │
│    Receipt      │ │    Warranty  │ │                  │
│ #receipt        │ │ #warranty    │ │ #insurance       │
└─────────────────┘ └──────────────┘ └────────┬─────────┘
                                              │
                                     (also linked to)
                                              │
                                   ┌──────────┴──────────┐
                                   │                      │
                                   ▼                      ▼
                          ┌──────────────┐     ┌──────────────┐
                          │ 🏠 Fridge    │     │ 🏠 Oven      │
                          │ #appliance   │     │ #appliance   │
                          └──────────────┘     └──────────────┘
TIP
Think of Item References as a web of connections. Any item can link to any other item, and you can navigate in both directions — TiniVault shows you which items reference the one you're looking at.